퀴즈1~2

1. 12/quiz-1.html에는 이미지가 삽입되어 있습니다. 다음 조건에 맞게 이미지 위로 마우스 포인터를 올려놓았을 때의 스타일을 정의하세요.

조건
1. 웹 문서에는 여러 이미지가 있을 수 있으므로 이미지에 적용된 class 속성 값을 확인하고
그 이름에 맞는 클래스 선택자 스타일을 작성합니다
2. 이미지 위로 마우스 포인터를 올려놓았을 때 검정색 5px짜리 실선이 표시되도록 합니다.
<!DOCTYPE HTML>
<html lang="ko">
<head>
  <meta charset="utf-8">
  <title>CSS 선택자</title>  
</head>
<body>
  <p>이미지 위로 마우스 포인터를 올려보세요</p>
  <img src="images/tangerines.jpg" class="top-img">
</body>
</html>

<!DOCTYPE HTML>
<html lang="ko">
  <style>
    [class="top-img"]:hover {
      border: 5px solid black;
    }
  </style>
<head>
  <meta charset="utf-8">
  <title>CSS 선택자</title> 
</head>
<body>
  <p>이미지 위로 마우스 포인터를 올려보세요</p>
  <img src="images/tangerines.jpg" class="top-img">
</body>
</html>


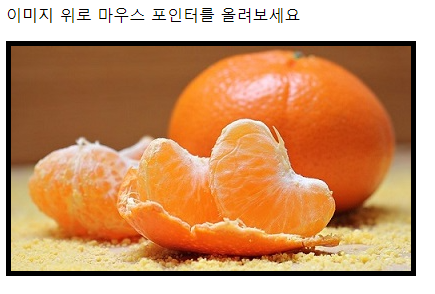
2. 12/quiz-2.html문서에 있는 내비게이션 링크에는 아무 스타일도 적용되어 있지 않기 때문에 파란색 밑줄이 있는 텍스트로 표시됩니다. 가상 클래스 선택자르 ㄹ사용해 다음 조건에 맞게 링크 스타일을 수정하세요

조건
1. 웹 문서에는 내비게이션 링크 외에도 다른 링크가 있을 수 있으므로 내비게이션 요소에 있는 링크에만 적용합니다
(내비게이션의 하위 선택자로 적용해야 합니다.)
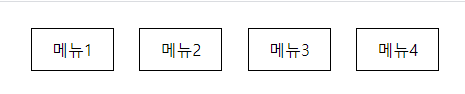
2. 링크의 글자 색을 '검정(black)'으로 지정하고 밑줄을 없앱니다.
3. 방문했던 링크의 글자 색을 원래 링크 색상인 '검정(black)'으로 지정합니다.
4. 링크를 클릭하는 순간의 글자 색을 '파랑(blue)'으로 지정합니다.
<!DOCTYPE HTML>
<html lang="ko">
<head>
  <meta charset="utf-8">
  <title>CSS 선택자</title>  
  <style>
    .main-menu {
      margin:50px auto;
      height:60px;
      border:1px solid black;
    }
    .main-menu ul {
      margin:0;
      list-style:none;
    }
    .main-menu ul li{
      display:inline-block;
      padding:10px 30px;      
      line-height:40px;
    }
  </style>
</head>
<body>
  <nav class="main-menu">
    <ul>
      <li><a href="#">메뉴1</a></li>
      <li><a href="#">메뉴2</a></li>
      <li><a href="#">메뉴3</a></li>
    </ul>
   </nav>
</body>
</html>

<!DOCTYPE HTML>
<html lang="ko">
<head>
  <meta charset="utf-8">
  <title>CSS 선택자</title>  
  <style>
    .main-menu {
      margin:50px auto;
      height:60px;
      border:1px solid black;
    }
    .main-menu ul {
      margin:0;
      list-style:none;
    }
    .main-menu ul li{
      display:inline-block;
      padding:10px 30px;      
      line-height:40px;
    }
    .main-menu ul li :link, :visited, :hover {
      color: black;
      text-decoration: none;
    }
    .main-menu ul li :active {
      color: blue;
    }
  </style>
</head>
<body>
  <nav class="main-menu">
    <ul>
      <li><a href="#">메뉴1</a></li>
      <li><a href="#">메뉴2</a></li>
      <li><a href="#">메뉴3</a></li>
    </ul>
   </nav>
</body>
</html>

'HTML > 다재다능한 CSS3 선택자' 카테고리의 다른 글

다재다능한CSS3선택자  (0) 2021.08.15

연습문제 1~2

1. quiz-1.html 문서를 다음 조건에 맞도록 수정하세요

1. float속성을 이용해 내비게이션 항목을 왼쪽부터 차례대로 배치합니다.
2. 내비게이션 항목의 오른쪽 마진을 15px로 지정해 각 항목들이 조금씩 떨어지도록 합니다.
3. 기존 margin-bottom값을20px로 수정합니다.
4. float속성 때문에 내비게이션 외의 항목에도 float의 영향을 받으므로 clear 속성을 사용해 '강아지 용품 준비하기'부터는 float의 영향을 받지 않도록 합니다.
<!DOCTYPE html>
<html lang="ko">
<head>
	<meta charset="utf-8">
	<title>HTML5 레이아웃</title>
  <style>
    body{
      font-family:"맑은 고딕", "고딕", "굴림";
    }
    a:link {
      text-decoration:none;
    }
    nav ul{
      list-style-type:none;
      margin:0px;
      padding:0px;
    }
    nav ul li{
      font-size:1.5em;
      padding-left:7px;
      margin-bottom:15px;
      border-left-width:5px;
      border-left-color:#990066;
      border-left-style:solid;
    }
    section article {
      padding-left:10px;
      margin-bottom:10px;
      border-top:1px #a6a6a6 dashed;
      border-bottom: 1px #a6a6a6 dashed;
    }
  </style>
</head>
<body>
  <nav>
    <ul>
      <li><a href="#">애완견 종류</a></li>
      <li><a href="#">입양하기</a></li>
      <li><a href="#">건강돌보기</a></li>
      <li><a href="#">더불어살기</a></li>
    </ul>
  </nav>
<section id="content">
  <h2>강아지 용품 준비하기</h2>
  <article>  
    <h3>강아지 집 </h3>
     <p>강아지가 편히 쉴 수 있는 포근한 집이 필요합니다. 강아지의 집은 강아지가 다 큰 후에도 계속 쓸 수 있는 집으로 구입하세요.집을 구입하실 때는 박음질이 잘 되어 있는지, 세탁이 간편한 제품인지 꼭 확인하시고 고르시는 것이 좋습니다.</p>
  </article>
  <article> 
    <h3>강아지 먹이 </h3>
    <p>강아지의 먹이는 꼭 어린 강아지용으로 나와있는 사료를 선택하세요. 강아지들은 사람에 비해 성장속도가 8배정도 빠르답니다. 따라서 강아지에게는 성장속도에 맞는 사료를 급여하셔야 합니다. 사람이 먹는 음식을 먹게 되면 양념과 향신료에 입맛이 익숙해지고, 비만이 될 가능성이 매우 높아집니다. 강아지용 사료는 생후 12개월까지 급여하셔야 합니다.</p>
   </article>  
 </section>
<footer>
  <p>Copyright 2012 funnycom</p>
</footer>
</body>
</html>


<!DOCTYPE html>
<html lang="ko">
<head>
	<meta charset="utf-8">
	<title>HTML5 레이아웃</title>
  <style>
    body{
      font-family:"맑은 고딕", "고딕", "굴림";
    }
    a:link {
      text-decoration:none;
    }
    nav ul{
      float:left;
      list-style-type:none;
      margin:0px;
      padding:0px;
    }
    nav ul li{
      display:inline-block;
      margin-right: 15px;
      font-size:1.5em;
      padding-left:7px;
      margin-bottom:15px;
      border-left-width:5px;
      border-left-color:#990066;
      border-left-style:solid;
    }
    section article {
      padding-left:10px;
      margin-bottom:20px;
      border-top:1px #a6a6a6 dashed;
      border-bottom: 1px #a6a6a6 dashed;
    }
    h2 {
      clear:both;
    }
  </style>
</head>
<body>
  <nav>
    <ul>
      <li><a href="#">애완견 종류</a></li>
      <li><a href="#">입양하기</a></li>
      <li><a href="#">건강돌보기</a></li>
      <li><a href="#">더불어살기</a></li>
    </ul>
  </nav>
<section id="content">
  <h2>강아지 용품 준비하기</h2>
  <article>  
    <h3>강아지 집 </h3>
     <p>강아지가 편히 쉴 수 있는 포근한 집이 필요합니다. 강아지의 집은 강아지가 다 큰 후에도 계속 쓸 수 있는 집으로 구입하세요.집을 구입하실 때는 박음질이 잘 되어 있는지, 세탁이 간편한 제품인지 꼭 확인하시고 고르시는 것이 좋습니다.</p>
  </article>
  <article> 
    <h3>강아지 먹이 </h3>
    <p>강아지의 먹이는 꼭 어린 강아지용으로 나와있는 사료를 선택하세요. 강아지들은 사람에 비해 성장속도가 8배정도 빠르답니다. 따라서 강아지에게는 성장속도에 맞는 사료를 급여하셔야 합니다. 사람이 먹는 음식을 먹게 되면 양념과 향신료에 입맛이 익숙해지고, 비만이 될 가능성이 매우 높아집니다. 강아지용 사료는 생후 12개월까지 급여하셔야 합니다.</p>
   </article>  
 </section>
<footer>
  <p>Copyright 2012 funnycom</p>
</footer>
</body>
</html>

2. quiz-2.html문서에는 기본적인 표를 사용한 내용이 들어 있습니다. 다음 표를 만들기 위해 조건에 맞게 표 스타일을 적용하세요.

1. 표와 셀에 테두리(1px solid black)를 그린 후 한 줄로 합쳐 표시하세요.
2. 표의 설명 글(caption)은 표 아래쪽에 표시하세요.
3. 각 셀에는 padding:10px을 적용해 적절한 여백을 두세요.
4. 배경 색을 #eee로 지정하는 클래스 선택자 .heading을 정의한 후 첫 번째 행과 첫 번째 열에 적용하세요.
<!DOCTYPE html>
<html lang="ko">
<head>
	<meta charset="utf-8">
	<title>표 스타일</title>
</head>
<body>
  <table border="1">
    <caption>2015 국민 독서실태</caption>
    <thead>
      <tr>
        <th>구분</th>
        <th>성인</th>
        <th>학생</th>
      </tr>
    </thead>
    <tbody>
      <tr>
        <th>독서율</th>
        <td>65.3%</td>
        <td>94.9%</td>
      </tr>
      <tr>
        <th>연평균 독서량</th>
        <td>9.1권</td>
        <td>29.8권</td>
      </tr>
      <tr>
        <th>공공도서관 이용률</th>
        <td>28.2%</td>
        <td>64.9%</td>
      </tr>      
    </tbody>
  </table>
</body>
</html>

<!DOCTYPE html>
<html lang="ko">
  <style>
    table {
      border: 1px solid black;
      caption-side:bottom;
      border-collapse: collapse;
    }
    tr td, th{
      border: 1px solid black;
      padding: 10px;
    }
    th {
      background-color: #eee;
    }
  </style>
<head>
	<meta charset="utf-8">
	<title>표 스타일</title>
</head>
<body>
  <table>
    <caption>2015 국민 독서실태</caption>
    <thead>
      <tr>
        <th>구분</th>
        <th>성인</th>
        <th>학생</th>
      </tr>
    </thead>
    <tbody>
      <tr>
        <th>독서율</th>
        <td>65.3%</td>
        <td>94.9%</td>
      </tr>
      <tr>
        <th>연평균 독서량</th>
        <td>9.1권</td>
        <td>29.8권</td>
      </tr>
      <tr>
        <th>공공도서관 이용률</th>
        <td>28.2%</td>
        <td>64.9%</td>
      </tr>      
    </tbody>
  </table>
</body>
</html>

'HTML > CSS 레이아웃' 카테고리의 다른 글

CSS 레이아웃  (0) 2021.08.15

퀴즈1~2

1. 박스 모델의 네 방향 테두리 두께를 다르게 지정하기 위해 다음과 같은 CSS 소스를 사용했습니다. 이것을 border-width 속성 하나로 묶어 지정하려면 기존 4개의 값을 어떻게 나열해야 할지 작성하세요.

border-top-width: 5px
border-bottom-width: 10px
border-left-width: 15px
border-right-width: 20px

답: border-width: 5px 20px 10px 15px


2. 08/quiz-2.html에는 4개 항목이 있는 순서없는 목록이 삽입되어 있습니다. 여기에 다음 조건에 맞는 CSS를 적용해 가로 내비게이션 메뉴로 만드세요

1. 목록의 불릿을 없앱니다.
2. 목록의 항목을 가로로 배치합니다.
3. 각 항목에 1픽셀짜리 검은색 실선을 표시합니다.
4. 각 항목의 상하 패딩은 10px, 좌우 패딩은 20px로 지정합니다.
5. 각 항목의 네 방향 마진은 10px로 지정합니다.
<!doctype html>
<html lang="ko">
	<head>
		<meta charset="utf-8">
		<title>display 속성</title>
		<style>
			a:link, a:visited {
				color:black;
				text-decoration: none;
			}
		</style>
	</head>
	<body>
		<nav>
			<ul>
				<li><a href="#">메뉴1</a></li>
				<li><a href="#">메뉴2</a></li>
				<li><a href="#">메뉴3</a></li>
				<li><a href="#">메뉴4</a></li>
			</ul>
		</nav>
	</body>
</html>

<!doctype html>
<html lang="ko">
	<head>
		<meta charset="utf-8">
		<title>display 속성</title>
		<style>
			a:link, a:visited {
				border-style: solid;
				border-width: 1px;
				color:black;
				text-decoration: none;
				padding: 10px 20px;
				margin: 10px;
				list-style-type: none;
				display: inline-block;
			}
			ul li {
				list-style-type: none;
				display: inline-block;
			}
		</style>
	</head>
	<body>
		<nav>
			<ul>
				<li><a href="#">메뉴1</a></li>
				<li><a href="#">메뉴2</a></li>
				<li><a href="#">메뉴3</a></li>
				<li><a href="#">메뉴4</a></li>
			</ul>
		</nav>
	</body>
</html>

'HTML > CSS 박스 모델' 카테고리의 다른 글

CSS 박스 모델  (0) 2021.08.14

퀴즈 1~2

1. 다음은 예약 페이지의 일부입니다. 04/quiz-1.html에는 '예약 정보'라는 제목만 표시되어 있습니다. 아래 폼 소스의 빈칸을 채우면서 04/quiz-1.html 문서에 폼을 추가하세요.

<!doctype html>
<html lang="ko">
<head>
	<meta charset="utf-8">
	<title>예약 접수</title>
	<style>
		ul {
			list-style:none;
		}
		li {
			line-height:50px;
		}
		label {
			width:60px;
			float:left;
		}
	</style>
</head>
<body>
	<h1>예약 정보</h1>

</body>
</html>
<!doctype html>
<html lang="ko">
<head>
	<meta charset="utf-8">
	<title>예약 접수</title>
	<style>
		ul {
			list-style:none;
		}
		li {
			line-height:50px;
		}
		label {
			width:60px;
			float:left;
		}
	</style>
</head>
<body>
	<h1>예약 정보</h1>
	<form>
		<ul>
			<li>
				<label for="r-name">이름</label>
				<input type="text" id="r-name">
			</li>
			<li>
				<label for="r-phone">휴대폰</label>
				<input type="text" id="r-phone">
			</li>
			<li>
				<label for="r-email">이메일</label>
				<input type="text" id="r-email">
			</li>
			<li>
			<input type="button" value="예약하기">
			</li>
		</ul>
	</form>
</body>
</html>


2. 04/quiz-2.html에 '프런트엔드 개발자 지원서'용 폼을 만들려고 한다. 다음 조건을 만족시키도록 <form> 태그와 </form> 태그 사이에 소스를 추가하세요.

<!doctype html>
<html lang="ko">
  <head>
    <meta charset="utf-8">
    <title>프런트엔드 개발자 지원서</title>
    <style>
			#container { 
				width:520px;
				border:1px solid black;
				padding:20px 40px;
				margin:0 auto;
			}
      fieldset { margin-bottom:15px; }
      legend { font-weight:bold; }
			ul {list-style-type: none;}
			li { line-height:30px;}
    </style>
  </head>
  <body>
		<div id="container">
			<h1>프런트엔드 개발자 지원서 </h1>
			<p>HTML, CSS, Javascript에 대한 기술적 이해와 경험이 있는 분을 찾습니다.</p>
			<hr>
			<form>
				
			</form>
		</div>
  </body>
</html>
<!doctype html>
<html lang="ko">
  <head>
    <meta charset="utf-8">
    <title>프런트엔드 개발자 지원서</title>
    <style>
			#container { 
				width:520px;
				border:1px solid black;
				padding:20px 40px;
				margin:0 auto;
			}
      fieldset { margin-bottom:15px; }
      legend { font-weight:bold; }
			ul {list-style-type: none;}
			li { line-height:30px;}
    </style>
  </head>
  <body>
		<div id="container">
			<h1>프런트엔드 개발자 지원서 </h1>
			<p>HTML, CSS, Javascript에 대한 기술적 이해와 경험이 있는 분을 찾습니다.</p>
			<hr>
			<form>
				<legend>개인정보</legend>
					<ul>
						<li>
							<label for="r-name">이름</label>
							<input type="text" id="r-name" placeholder="공백 없이 입력하세요.">
						</li>
						<li>
							<label for="r-phone">연락처</label>
							<input type="tel" id="r-phone">
						</li>
					</ul>
					<legend>지원 분야</legend>
					<ul>
						<li>
							<label><input type="radio" name="webp" value="webp">웹 퍼블리싱</label>
						</li>
						<li>
							<label><input type="radio" name="web-dev" value="web-dev">웹 애플리케이션 개발</label>
						</li>
						<li>
							<label><input type="radio" name="imp-dev" value="imp-dev">개발 환경 개선</label>
						</li>
					</ul>
					<legend>지원동기</legend><br>
						<label for="container" >
						<p><textarea name="" cols="60" rows="5" placeholder="본사 지원 동기를 간략히 써 주세요." ></textarea></p>
						<button>접수하기</button>
						<button>다시쓰기</button>
			</form>
		</div>
  </body>
</html>

'HTML > 폼 관련 태그들' 카테고리의 다른 글

폼 만들기  (0) 2021.08.05


    <blockquote>인용내용</blockquote>

예제2-02

<!DOCTYPE html>
<html>
<head>
    <meta charset='utf-8'>
    <meta http-equiv='X-UA-Compatible' content='IE=edge'>
    <title>Page Title</title>
    <meta name='viewport' content='width=device-width, initial-scale=1'>
</head>
<body>
    <h3>로컬 스토리지(Local Storage)를 저장하는 함수 : </h3>
    <pre>
        function savetheLocal(){
            var second = document.getElementById("second");
            var thevalue = second.value;
            localStorage.setItem(1, thevalue);
            gettheLocal();
        }
    </pre>
</body>
</html>

예제 2-03

<!DOCTYPE html>
<html>
<head>
    <meta charset='utf-8'>
    <meta http-equiv='X-UA-Compatible' content='IE=edge'>
    <title>Page Title</title>
    <meta name='viewport' content='width=device-width, initial-scale=1'>
</head>
<body>
    <h2>제주 이색 여행지 - 이중섭 거리</h2>
    <p><strstrong>주말</strstrong>마다 <b> '서귀포문화예술디자인시장'</b>이 열립니다.</p>
    <p><em>'아트마켓'</em>이라고도 부르는데 <i>문화예술체험</i>이나 <i>공연관람
    </i>을 할 수도 있고 <br>작가들이 직접 만든 창작예술품 등을 판매하기도 합니다</p>
</body>
</html>

예제 2-04

<!DOCTYPE html>
<html>
<head>
    <meta charset='utf-8'>
    <meta http-equiv='X-UA-Compatible' content='IE=edge'>
    <title>Page Title</title>
    <meta name='viewport' content='width=device-width, initial-scale=1'>
</head>
<body>
    <h1>웹 접근성</h1>
    <p>웹의 창시자인 팀 버너스 리(Tim Berners-Lee)의 <q cite="http://www.w3.org/standards/webdesign/accessibility">
    웹의 힘은 보편성에 있다. 장애에 구애없이 모든 사람이 접근할 수 있는 것이 필수적인 요소이다. 
    </q>라는 말로 웹 접근성을 설명한다. </p>
</body>
</html>

웹브라우저의 크기에 따라 폭이 자동적으로 조절된다.


예제 2-05

<!DOCTYPE html>
<html>
<head>
    <meta charset='utf-8'>
    <meta http-equiv='X-UA-Compatible' content='IE=edge'>
    <title>Page Title</title>
    <meta name='viewport' content='width=device-width, initial-scale=1'>
</head>
<body>
    <h2>야외 텐트를 닮은 건축물 <mark>"테쉬폰"</mark></h2> <!--강조의 h2, 글자배경색 mark-->
    <p>아일랜드 출신 ...... 남아 있으며 <span style="color:blue;"">국내 근현대 건축사의 한 페이지를 보여주는
     가치를 지닌다.</span>고 전문가들은 평가합니다.</p>
</body>
</html>


기타 텍스트 관련 태그들

<!DOCTYPE html>
<html>
<head>
    <meta charset='utf-8'>
    <meta http-equiv='X-UA-Compatible' content='IE=edge'>
    <title>Page Title</title>
    <meta name='viewport' content='width=device-width, initial-scale=1'>
</head>
<body>
    <p><b><abbr title="Internet of Things">1. IoT</abbr></b>란
     각종 사물에 센서와 통신 기능을 내장해 인터넷에 연결하는 기술을 의미한다</p>
     <br>
     <p>2. 내가 경험한 가장 흥미진진한 일은 누군가를 만나는일이다 - 영화, <cite>'비포선셋' </cite> 중</p>
    <br>
    <pre><code> function savetheLocal(){ ...... }</code></pre>
    <br>
    <p>3. 웹 화면을 다시 불러오려면 <kbd>F5</kbd>키를 누릅니다.</p>
    <br>
    <p>4. 가격 : 13,000원<small>(부가세 별도)</small></p>
    <br>
    <p>5. 물의 화학식은 <b>H<sub>2</sub>0</b>다 </p>
    <br>
    <p>6. E = mc<sup>2</sup> </p>
    <br>
    <p><s>7. 34,000원</s><strong>19,000원</strong></p>
    <br>
    <p>8. 링크 표시 용도가 아니라 단순히 밑줄을 긋는다면 <u> u 태그</u></p>
</body>
</html>


목록을 만드는 태그

<!DOCTYPE html>
<html>
<head>
    <meta charset='utf-8'>
    <meta http-equiv='X-UA-Compatible' content='IE=edge'>
    <title>Page Title</title>
    <meta name='viewport' content='width=device-width, initial-scale=1'>
</head>
<body>
    <h1>관광 안내 전화</h1>
    <p>한국관광공사에서는  ......실시하고 있습니다.</p>
    <p>1330에는 ...... 이용 가능합니다.</p>
    <ul>
        <li>일반 전화 : (국번없이) 1330</li>
        <li>휴대 전화 : 064-1330</li>
    </ul>
</body>
</html>


예제2.ol.html

<!DOCTYPE html>
<html>
<head>
    <meta charset='utf-8'>
    <meta http-equiv='X-UA-Compatible' content='IE=edge'>
    <title>Page Title</title>
    <meta name='viewport' content='width=device-width, initial-scale=1'>
</head>
<body>
    <h1>1박 2일 가족 여행 코스</h1>
    <li>1일차
        <ol type="a">
            <li>해녀박물관</li>
            <li>낚시체험</li>
        </ol>
    </li>
    <li>2일차
        <ol type="a" start="3">
            <li>용눈이오름</li>
            <li>만장굴</li>
            <li>카약체험</li>
        </ol>
    </li>
</body>
</html>

예제 02/dl.html

<!DOCTYPE html>
<html>
<head>
    <meta charset='utf-8'>
    <meta http-equiv='X-UA-Compatible' content='IE=edge'>
    <title>Page Title</title>
    <meta name='viewport' content='width=device-width, initial-scale=1'>
</head>
<body>
    <h1>제주 올레</h1>
    <dl>
        <dt>올레 1코스</dt>
        <dd>코스 : 시흥 초등학교 옆 - 광치기 해변</dd>
        <dd>거리 : 14.6km(4~5시간)</dd>
        <dd>난이도 : 중</dd>
        <dt>올레 2코스</dt>
        <dd>코스 : 광치기 해변 - 온평 포구</dd>
        <dd>거리 : 14.5km(4~5시간)</dd>
        <dd>난이도 : 중</dd>
    </ul>
</dl>
</body>
</html>

<!DOCTYPE html>
<html>
<head>
    <meta charset='utf-8'>
    <meta http-equiv='X-UA-Compatible' content='IE=edge'>
    <title>Page Title</title>
    <meta name='viewport' content='width=device-width, initial-scale=1'>
</head>
<body>
    <table border="table">
        <tr>
            <th> 제목 셀</th>
            <td> 1행 2열 </td>
            <td> 1행 3열 </td>
        </tr>
        <tr>
            <th> 제목 셀 </th>
            <td> 2행 2열 </td>
            <td> 2행 3열 </td>
        </tr>
    </table>
</body>
</html>

<!DOCTYPE html>
<html>
<head>
    <meta charset='utf-8'>
    <meta http-equiv='X-UA-Compatible' content='IE=edge'>
    <title>Page Title</title>
    <meta name='viewport' content='width=device-width, initial-scale=1'>
</head>
<body>
    <table border="table">
        <tr>
            <th>이름</th>
            <td></td>
            <th>연락처</th>
            <td></td>
        </tr>
        <tr>
            <th>주소</th>
            <td conspan="3"></td>
        </tr>
        <tr>
            <th>자기소개</th>
            <td colspan="3"></td>
        </tr>
    </table>
</body>
</html>

<!DOCTYPE html>
<html>
<head>
    <meta charset='utf-8'>
    <meta http-equiv='X-UA-Compatible' content='IE=edge'>
    <title>Page Title</title>
    <meta name='viewport' content='width=device-width, initial-scale=1'>
</head>
<body>
    <table border="table">
        <caption>
            <strong>Modern Browser</strong>
            <p>국내에서 자주 사용하는 모던 브라우저</p>
            </caption>
            <tr>
                <th>브라우저</th>
                <th>제조업체</th>
                <th>다운로드</th>
            </tr>
            <tr> ...... </tr>
            <tr> ...... </tr>
            <tr> ...... </tr>
        </caption>
    </table>
</body>
</html>

예제02/table-6.html

<!DOCTYPE html>
<html>
<head>
    <meta charset='utf-8'>
    <meta http-equiv='X-UA-Compatible' content='IE=edge'>
    <title>Page Title</title>
    <meta name='viewport' content='width=device-width, initial-scale=1'>
    <style>
        table {
            margin:0 auto;
            border-spacing: 0;
            border-collapse: collapse;
        }
        table, th, td {
            border:1px solid;
        }
        th, td {
            padding:10px;
            width: 150px;
        }
        thead, tfoot {background: #bbb;}
        caption{margin: 10px;}
    </style>
</head>
<body>
    <table>
        <caption>제주특별자치도 학교현황(2015.4.1기준)</caption>
        <thead>
            <tr>
                <th>구분</th>
                <th>학교수</th>
                <th>학급수</th>
                <th>학생수</th>
                <th>교원수</th>
            </tr>
        </thead>
        <tbody>
            <tr>
                <th>유치원</th>
                <td>117</td>
                <td>252</td>
                <td>5,547</td>
                <td>474</td>
            </tr>
            <tr>
                <th>유치원</th>
                <td>117</td>
                <td>252</td>
                <td>5,547</td>
                <td>474</td>
            </tr>
            <tr>
                <th>유치원</th>
                <td>117</td>
                <td>252</td>
                <td>5,547</td>
                <td>474</td>
            </tr>
            <tr>
                <th>유치원</th>
                <td>117</td>
                <td>252</td>
                <td>5,547</td>
                <td>474</td>
            </tr>
            <tr>
                <th>유치원</th>
                <td>117</td>
                <td>252</td>
                <td>5,547</td>
                <td>474</td>
            </tr>
              <tfoot>
            <tr>
                <th>합계</th>
                <td>304</td>
                <td>3,437</td>
                <td>86,954</td>
                <td>6,111</td>
            </tr>
              </tfoot>
        </tbody>
    </table>
    
</body>
</html>


예제02/colgroup.html

<head>
    <meta charset='utf-8'>
    <meta http-equiv='X-UA-Compatible' content='IE=edge'>
    <title>Page Title</title>
    <meta name='viewport' content='width=device-width, initial-scale=1'>
    <style>
        table {width: 200px; height: 40px; border:solid}
        table td {border: solid}
    </style>
</head>
<body>
    <table>
        <caption>colgroup 연습</caption>
        <colgroup>
            <col>
            <col span="2" style="background-color:blue;">
            <col style="background-color: yellow;">
        </colgroup>
        <tr>
            <td></td>
            <td></td>
            <td></td>
            <td></td>
        </tr>
        <tr>
            <td></td>
            <td></td>
            <td></td>
            <td></td>
        </tr>
    </table>
</body>
</html>


연습문제1~4

1. 텍스트들이 미리 입력되어 있는 quiz-1.html 문서를 열고 다음 조건에 맞게 태그를 추가하세요.

<!doctype html>
<html lang="ko">
	<style>
		title {font-size: 20px;}
	</style>
<head>
	<meta charset="utf-8">
	<title>서울특별시</title>
</head>
<body>
	<div style="float:left; width:150px; margin-right:25px;">
		<img src="images/symbol.gif" alt="서울특별시 휘장">
	</div>
	<div>
	<h1>서울특별시</h1>
	<b>서울의 지향 이미지 : 역사와 활력의 인간도시<br><br></b>
		<tr>
			<td><i>휘장은 한글 '서울'을 서울의 산, 해, 한강으로 나타내면서 전체적으로는 신명나는 사람의 모습을 형상화한 것으로 인간 중심도시를 지향하는 서울을 상징합니다.</i><br></td>
			<br>
		</tr>
		<tr>
			<td>자연 - 인간 - 도시의 맥락 속에서 녹색 산은 환경사랑, 청색 한강은 역사와 활력, 가운데 해는 미래의 비전과 희망을 함축하고, 이 세가지 요소를 붓터치로 자연스럽게 연결하여 서울의 이미지와 사람의 활력을 친근하게 느낄 수 있도록 하였습니다.</td>
		</tr>
	</div>
</body>
</html>


2. 기본적인 HTML문서를 만들고 quiz-2.txt문서의 텍스트를 가져와 다음과 같이 표기하세요.

<!DOCTYPE html>
<html>
<head>
    <meta charset='utf-8'>
    <meta http-equiv='X-UA-Compatible' content='IE=edge'>
    <title>이지스퍼블리싱 신입 사원 모집 공고</title>
    <meta name='viewport' content='width=device-width, initial-scale=1'>
</head>
    <style>
        title {font-size: 30px;}
    </style>
<body>
    <h1>이지스퍼블리싱 신입 사원 모집 공고</h1>
    <table>
        <p>IT 기획, 편집 부서에서 함께 할 신입 사원을 모집합니다.</p>
        <ul>
            <li>모집 직군 : 편집 기획 부서</li>
            <li>직무 내용 : 도서 프로듀싱 업무 (신입 지원 가능)</li>
                <ul>
                    <li>- 도서 기획, 편집</li>
                    <li>- 도서 홍보, 독자 소통</li>
                </ul>
            <li>접수 마감일 : 2016.3.6.</li>
        </ul>
        <tfoot>
            <p>자세한 내용은 공지 게시판을 참고하세요.</p>
        </tfoot>
    </table>

</body>
</html>

3. quiz-3.html에 미리 입력된 텍스트를 두 가지 종류의 순서 있는 목록으로 표시하세요.

<!doctype html>
<html lang="ko">
<head>
	<meta charset="utf-8">
	<title>커피 드립 순서</title>
</head>
<body>
	<p>커피 드립 순서 - 아라비아 숫자</p>
	<table>
		<ol>
		<li>필터접기</li>
		<li>분쇄</li>
		<li>불림</li>
		<li>추출</li>
		</ol>
	</table>
	<p>커피 드립 순서 - 알파벳 소문자</p>
	<table>
	<ol type="a">
		<li>필터접기</li>
		<li>분쇄</li>
		<li>불림</li>
		<li>추출</li>
	</ol>
	</table>
</body>
</html>

4. quiz-4.html 문서에 그림과 같은 표를 작성하세요.

<!doctype html>
<html lang="ko">
<head>
	<meta charset="utf-8">
	<title>주요 SNS 서비스별 이용률</title>
	<style>
		table, th, td { 
			border:1px solid gray;  /* 표의 테두리 - 1px 회색 실선 */
			border-collapse:collapse;  /* 표 테두리와 셀 테두리 합치기 */
		}
		th, td {
			width:120px;  /* 셀 너비 */
			padding:5px;  /* 셀 패딩(테두리와 내용 사이의 여백) */
		}
	</style>
</head>
<body>
	<table>
		<caption>
			<strong>주요 SNS 서비스별 이용률(%)</strong>
		</caption>
		<thread>
			<tr>
				<td></td>
				<th>페이스북</th>
				<th>카카오스토리</th>
				<th>밴드</th>
				<th>인스터그램</th>
				<th>트위터</th>
			</tr>
		</thread>
		<tr>
			<th>2015년</th>
			<td>77.1</td>
			<td>58.3</td>
			<td>32.4</td>
			<td>16.7</td>
			<td>22.1</td>
		</tr>
		<tr>
			<th>2016년</th>
			<td>73.8</td>
			<td>51.0</td>
			<td>40.1</td>
			<td>28.1</td>
			<td>14.7</td>
		</tr>
	</table>
</body>
</html>


'HTML > 텍스트 관련 태그들' 카테고리의 다른 글

텍스트 관련 태그들  (0) 2021.08.03

6-21 Tv클래스를 주어진 로직대로 완성하시오 완성한 후에 실행해서 주어진 실행결과와 일치하는지 확인하라.

class MyTv {
	boolean isPowerOn;
	int channel;
	int volume;
	final int MAX_VOLUME = 100;
	final int MIN_VOLUME = 0;
	final int MAX_CHANNEL = 100;
	final int MIN_CHANNEL = 1;

	void turnOnOff() {
		// (!) isPowerOn의 값이 true면 false로, false면 true로 바꾼다
	}

	void volumeUp() {
		// (2) voulum의 값이 MAX_VOLUME보다 작을 때만 값을 1증가시킨다/
	}

	void volumeDown() {
		// (3) volum의 값이 MIN_VOLUME보다 클 때만 값을 1감소시킨다.
	}

	void channelUp() {
		// (4) channel의 값을 1 증가시킨다.
		// 만일 channel이 MAX_CHANNEL이면, channel의 값을 MIN_CHANNEL로 다시 바꾼다.
	}

	void channelDown() {
		// (5)channel의 값을 1감소시킨다.
		// 만일 channel이 MIN_CHANNEL이면, channel의 값을 MAX_CHANNEL로 바꾼다.

	} // class MyTv

class Exercise6_21 {
	public static void main(String args[]) {
		MyTv t = new MyTv();
		t.channel = 100;
		t.volume = 0;
		System.out.println("CH:" + t.channel + ", VOL:" + t.volume);

		t.channelDown();
		t.volumeDown();
		System.out.println("CH:" + t.channel + ", VOL:" + t.volume);

		t.volume = 100;
		t.channelUp();
		t.volumeUp();
		System.out.println("CH:" + t.channel + ", VOL:" + t.volume);

	}
}
class MyTv {
	boolean isPowerOn;
	int channel;
	int volume;
	final int MAX_VOLUME = 100;
	final int MIN_VOLUME = 0;
	final int MAX_CHANNEL = 100;
	final int MIN_CHANNEL = 1;

	void turnOnOff() {
		// (!) isPowerOn의 값이 true면 false로, false면 true로 바꾼다
		isPowerOn = !isPowerOn;
	}

	void volumeUp() {
		// (2) voulume의 값이 MAX_VOLUME보다 작을 때만 값을 1증가시킨다/
		if (volume < MAX_VOLUME)
			volume += 1;
	}

	void volumeDown() {
		// (3) volume의 값이 MIN_VOLUME보다 클 때만 값을 1감소시킨다.
		if (volume > MIN_VOLUME)
			volume -= 1;
	}

	void channelUp() {
		// (4) channel의 값을 1 증가시킨다.
		// 만일 channel이 MAX_CHANNEL이면, channel의 값을 MIN_CHANNEL로 다시 바꾼다.
		if (channel == MAX_CHANNEL)
			channel = MIN_CHANNEL;
		else
			channel += 1;
	}

	void channelDown() {
		// (5)channel의 값을 1감소시킨다.
		// 만일 channel이 MIN_CHANNEL이면, channel의 값을 MAX_CHANNEL로 바꾼다.
		if (channel == MIN_CHANNEL)
			channel = MAX_CHANNEL;
		else
			channel -= 1;
	}
} // class MyTv

class Exercise6_21 {
	public static void main(String args[]) {
		MyTv t = new MyTv();
		t.channel = 100;
		t.volume = 0;
		System.out.println("CH:" + t.channel + ", VOL:" + t.volume);

		t.channelDown();
		t.volumeDown();
		System.out.println("CH:" + t.channel + ", VOL:" + t.volume);

		t.volume = 100;
		t.channelUp();
		t.volumeUp();
		System.out.println("CH:" + t.channel + ", VOL:" + t.volume);

	}
}
CH:100, VOL:0
CH:99, VOL:0
CH:100, VOL:100


6-22 다음과 같이 정의된 메서드를 작성하고 테스트하시오.

매서드명 : isNumber

기     능 : 주어진 문자열이 모두 숫자로만 이루어져있는지 확인한다.

모두 숫자로만 이루어져 있으면 true를 반환하고, 그렇지 않으면 false를 반환한다.

만일 주어진 문자열이 null이거나 빈문자열 ""이라면 false를 반환한다.

반환타입 : boolean

매개변수 : String str - 검사할 문자열

[Hint] String클래스의 charAt(int i)메서드를 사용하면 문자열의 i번째 위치한 문자를 얻을 수 있다.

public class Exercise6_22 {
	/*
	 * (1) isNumber . 메서드를 작성하시오
	 */
	public static void main(String[] args) {
	String str = "123";
	System.out.println(str+"는 숫자입니까? "+isNumber(str));
	str = "1234o";
	System.out.println(str+"는 숫자입니까? "+isNumber(str));
	}
}
public class Exercise6_22 {

	public static boolean isNumber(String str) {
		if (str == null || str == "") {
			return false;
		}
		for(int i=0; i<str.length();i++) {
			char ch = str.charAt(i);
			
			if (ch<'0' && ch>'9'){
				return false;
			}
		}
		return true;
	}
	public static void main(String[] args) {
		String str = "123";
		System.out.println(str + "는 숫자입니까? " + isNumber(str));
		str = "1234o";
		System.out.println(str + "는 숫자입니까? " + isNumber(str));
	}
}


6-23 다음과 같이 정의된 메서드를 작성하고 테스트하시오.

매서드명 : max

기     능 : 주어진 int형 배열의 값 중에서 제일 큰 값을 반환한다. 

만일 주어진 배열이 null이거나 크기가 0인 경우,  -999999를 반환한다.

반환타입 : int 

매개변수 : int[] arr - 최대값을 구할 배열

public class Exercise6_23 {
	/*
	 * (1) max메서드를 작성하시오.
	 */
			}

		}
		return max;
	}

	public static void main(String[] args) {
		int[] data = { 3, 2, 9, 4, 7 };
		System.out.println(java.util.Arrays.toString(data));
		System.out.println("최대값 :" + max(data));
		System.out.println("최대값 :" + max(null));
		System.out.println("최대값 :" + max(new int[] {})); // 0 최대값 크기가 인 배열
	}
}
public class Exercise6_23 {
	/*
	 * (1) max메서드를 작성하시오.
	 */
	static int max(int[] arr) {
		if (arr == null || arr.length == 0)
			return -999999;
		int max = arr[0];

		for (int i = 0; i < arr.length-1; i++) {
			if (arr[i + 1] > max) {
				max = arr[i + 1];
			}

		}
		return max;
	}

	public static void main(String[] args) {
		int[] data = { 3, 2, 9, 4, 7 };
		System.out.println(java.util.Arrays.toString(data));
		System.out.println("최대값 :" + max(data));
		System.out.println("최대값 :" + max(null));
		System.out.println("최대값 :" + max(new int[] {})); // 0 최대값 크기가 인 배열
	}
}
[3, 2, 9, 4, 7]
최대값 :9
최대값 :-999999
최대값 :-999999


6-24 다음과 같이 정의된 메서드를 작성하고 테스트하시오.


메서드명 : abs

기     능 : 주어진 값의 절대값을 반환한다.

반환타입 : int

매개변수 : int value

class Exercise6_24 {
		/*
		 * 	(1) abs메서드를 작성하시오.
		 */
	public static void main(String[] args)
	{
		int value = 5;
		System.out.println(value+"의 절대값:"+abs(value));
		value = -10;
		System.out.println(value+"의 절대값:"+abs(value));
	}
}
class Exercise6_24 {
	public static int abs(int value) {
		if (value > 0) {
			return value;
		} else {
			return -value;
		}
	}
	public static void main(String[] args) {
		int value = 5;
		System.out.println(value + "의 절대값:" + abs(value));
		value = -10;
		System.out.println(value + "의 절대값:" + abs(value));
	}
}
5의 절대값:5
-10의 절대값:10

6-11 다음 중 this에 대한 설명으로 맞지 않은 것은? (모두 고르시오)  b

a. 객체 자신을 가리키는 참조 변수이다.

b. 클래스 내에서라면 어디서든 사용할 수 있다.

c. 지역변수와 인스턴스 변수를 구별할 때 사용한다.

d. 클래스 메서드 내에서는 사용할 수 없다.


b. 인스턴스 메서드에서만 사용 가능하다.


6-12 다음 중 오버 로딩이 성립하기 위한 조건이 아닌 것은? (모두 고르시오) c, d

a. 매머드의 이름이 같아야 한다.

b. 매개변수의 개수나 타입이 달라야 한다.

c. 리턴 타입이 달라야 한다.

d. 매개변수의 이름이 달라야 한다


c. 리턴타입이 달라야 한다.

리턴 타입은 오버 로딩에 영향을 주지 못한다.

매개변수는 같고 리턴 타입이 다른 경우는 오버 로딩이 성립되지 않는다. 어떤 것을 호출해야 할지 모르기 때문이다.


d 매개변수의 이름이 달라야 한다

리턴 타입은 오버 로딩에 영향을 주지 못한다.


6-13 다음 중 아래의 add메서드를 올바르게 오버 로딩한 것은? (모두 고르시오) b, c, d

long add(int a, int b) { return a+b;}

a. long add(int x, int y) { return x+y;}

b. long add(long a, long b) { return a+b;}

c. int add(byte a, byte b) { return a+b;}

d. int add(long a, int b) { return (int)(a+b);}


b, c, d는 모두 메서드의 이름이 add로 같고 매개변수의 타입이 다르다.


6-14 다음 중 초기화에 대한 설명으로 옳지 않은 것은? ( 모두 고르시오 ) c, e

a. 멤버 변수는 자동 초기화되므로 초기화하지 않고도 값을 참조할 수 있다.

b. 지역변수는 사용하기 전에 반드시 초기화해야 한다.

c. 초기화 블록보다 생성자가 먼저 수행된다. 

d. 명시적 초기화를 제일 우선적으로 고려해야 한다.

e. 클래스 변수보다 인스턴스 변수가 먼저 초기화된다


c. 초기화 블록이 먼저 수행된다.

e. 클래스 변수가 먼저 초기화된다.


6-15 다음 중 인스턴스 변수의 초기화 순서가 올바른 것은? a

a. 기본값-명시적 초기화-초기화 블록-생성자

b. 기본값-명시적 초기화-생성자-초기화 블록

c. 기본값-초기화 블록-명시적 초기화-생성자

d. 기본값-초기화 블록-생성자-명시적 초기화


명시적 초기화가 가장 먼저 일어나고 생성자가 늦게 초기화된다.


6-16 다음 중 지역변수에 대한 설명으로 옳지 않은 것은? (모두 고르시오) a, e

a. 자동 초기화되므로 별도의 초기화가 필요 없다.

b. 지역변수가 선언된 메서드가 종료되면 지역변수도 함께 소멸된다.

c. 매머드의 매개변수로 선언된 변수도 지역변수이다.

d. 클래스 변수나 인스턴스 변수보다 메모리 부담이 적다.

e. 힙(heap) 영역에 생성되며 가비지 컬렉터에 의해 소멸된다.


a. 지역변수는 자동 초기화가 되지 않는다.

e 지역변수는 call stack에 생성된다.


6-17 호출 스택이 다음과 같은 상황일 때 옳지 않은 설명은? (모두 고르시오) b


a. main 제일 먼저 호출 스택에 저장된 것은 메서드이다.

b. println 메서드를 제외한 나머지 메서드들은 모두 종료된 상태이다. 

c. method2 메서드를 호출한 것은 main 메서드이다.

d. println 메서드가 종료되면 메서드가 method1 수행을 재개한다.

e. main-method2-method1-println. 의 순서로 호출되었다

f. 현재 실행 중인 메서드는 println 뿐이다.


b 다른 메서드들은 대기 중인 상태이다.


6-18 다음의 코드를 컴파일하면 에러가 발생한다 컴파일 에러가 발생하는 라인과 그 이유를 설명하시오.

class MemberCall {
	int iv = 10;
	static int cv = 20;
	int iv2 = cv;
	static int cv2 = iv; // A 라인

	static void staticMethod1() {
		System.out.println(cv);
		System.out.println(iv); // B 라인
	}

	void instanceMethod1() {
		System.out.println(cv);
		System.out.println(iv); // C 라인
	}

	static void staticMethod2() {
		staticMethod1();
		instanceMethod1(); // D 라인
	}

	void instanceMethod2() {
		staticMethod1(); // E 라인
		instanceMethod1();
	}
}

A라인 static변수의 초기화에 인스턴스를 사용할 수 없다.

B라인 static메서드에서는 인스턴스변수를 사용할 수 없다.

D라인 static메서드에서는 인스턴스메서드를 사용할 수 없다.


6-19 다음 코드의 실행 결과를 예측하여 적으시오.

public class Exercise6_19 {
	public static void change(String str) {
		str += "456";
	}

	public static void main(String[] args) {
		String str = "ABC123";
		System.out.println(str);
		change(str);
		System.out.println("After change:" + str);
	}
}
ABC123
After change:ABC123


6-20 다음과 같이 정의된 메서드를 작성하고 테스트하시오.

class Exercise6_20 {

	/*
		(1) shuffle . 메서드를 작성하시오
	*/

	}

	public static void main(String[] args) {
		int[] original = { 1, 2, 3, 4, 5, 6, 7, 8, 9 };
		System.out.println(java.util.Arrays.toString(original));

		int[] result = shuffle(original);
		System.out.println(java.util.Arrays.toString(result));
	}
}
	public static int[] shuffle(int[] arr) {
		if (arr == null || arr.length == 0) {
			return arr;
		}
		for (int i = 0; i < arr.length - 1; i++) {
			int j = (int) (Math.random() * arr.length);

			int tmp = arr[i];
			arr[i] = arr[j];
			arr[j] = tmp;
		}
		return arr;
	}

	public static void main(String[] args) {
		int[] original = { 1, 2, 3, 4, 5, 6, 7, 8, 9 };
		System.out.println(java.util.Arrays.toString(original));

		int[] result = shuffle(original);
		System.out.println(java.util.Arrays.toString(result));
	}
}
[1, 2, 3, 4, 5, 6, 7, 8, 9]
[4, 5, 2, 9, 6, 3, 7, 8, 1]

일단 메모리를 공유해야하기 때문에 static으로 int형 shuffle 매서드를 만들고 배열의 자리를 바꾸는 코드를 짜주고 배열을 리턴하면 된다.

6-1 다음과 같은 멤버변수를 갖는 SutdaCard클래스를 정의하시오.

타 입 변수명 설 명
int num 카드의 숫자.(1~10사이의 정수)
boolean isKwang 광이면 true, 아니면 false
class SutdaCard {
	int num;
	boolean isKwang;
}

정의만 한 것이다.


6-2 문제 에서 정의한 클래스에 두 개의 생성자와 를 추가해서 실행결과와 같은 결과를 얻도록 하시오.

class Exercise6_2 {
	public static void main(String args[]) {
		SutdaCard card1 = new SutdaCard(3, false);
		SutdaCard card2 = new SutdaCard();
		System.out.println(card1.info()); // 3 . 이 출력된다
		System.out.println(card2.info()); // 1K . 가 출력된다
	}
}

class SutdaCard {
	int num;
	boolean isKwang;

	SutdaCard() {
		this(1, true); // SutdaCard(1, true) . 를 호출한다
	}

	SutdaCard(int num, boolean isKwang) {
		this.num = num;
		this.isKwang = isKwang;
	}

	String info() { // . ( ) K . 숫자를 문자열로 반환한다 광 인 경우 를 덧붙인다 光
		return num + (isKwang ? "K" : "");
	}
}


6-3 다음과 같은 멤버변수를 갖는  Student클래스를 정의하시오.

타입 변수명 설 명
String name 학생이름
int ban
int no 번호
int kor 국어점수
int eng 영어점수
int math 수학점수
public class Exercise06_3 {
}
class Student {
	String name;
	int ban;
	int no;
	int kor;
	int eng;
	int math;
}


6-4 문제 에서 정의한 클래스에 다음과 같이 정의된 두 개의 메서드getTotal()과 getAverage()를 추가하시오.

메서드명 : getTotal

기 능 : 국어 영어 수학 의 점수를 모두 더해서 반환한다.

반환타입 : int

매개변수 : 없음

2. : getAverage 메서드명 기 능 총점 국어점수 영어점수 수학점수 을 과목수로 나눈 평균을 구한다 소수점 둘째자리에서 반올림할 것.

반환타입 : float

매개변수 : 없음

class Exercise06_4 {
	public static void main(String args[]) {
		Student s = new Student();
		s.name = "홍길동 ";
		s.ban = 1;
		s.no = 1;
		s.kor = 100;
		s.eng = 60;
		s.math = 76;
		System.out.println("이름 :" + s.name);
		System.out.println("총점 :" + s.getTotal());
		System.out.println("평균 :" + s.getAverage());
	}
}
class Student {
	/*
	 * (1) . 알맞은 코드를 넣어 완성하시오
	 */
}


class Exercise06_4 {
	public static void main(String args[]) {
		Student s = new Student();
		s.name = "홍길동 ";
		s.ban = 1;
		s.no = 1;
		s.kor = 100;
		s.eng = 60;
		s.math = 76;
		System.out.println("이름 :" + s.name);
		System.out.println("총점 :" + s.getTotal());
		System.out.println("평균 :" + s.getAverage());
	}
}

class Student {
	String name;
	int ban;
	int no;
	int kor;
	int eng;
	int math;

	int getTotal() {
		return kor+math+eng;
	}
	float getAverage() {
		return (int)(getTotal() / 3f * 10 + 0.5f) / 10f;
	}
}
이름 :홍길동 
총점 :236
평균 :78.7

평균을 구하는식에서 int타입은 소수점이 버려지는것을 이용한 식이다.


6-6 두 점의 거리를 계산하는 를 완성하시오. getDistance()

[Hint] 제곱근 계산은 를 사용하면 된다. Math.sqrt(double a)

public class Exercise6_06 {
	static double getDistance(int x, int y, int x1, int y1) {
		/*
		 * (1) . 알맞은 코드를 넣어 완성하시오
		 */
	}
	public static void main(String args[]) {
		System.out.println(getDistance(1, 1, 2, 2));
	}
}
public class Exercise6_06 {
	static double getDistance(int x, int y, int x1, int y1) {

		return Math.sqrt((x-x1)*(x-x1)+(y-y1)*(y-y1));
	}
	public static void main(String args[]) {
		System.out.println(getDistance(1, 1, 2, 2));
	}
}
1.4142135623730951

제곱근을 구하면 된다.

Math.sqrt는 double타입을 반환한다.


6-7 문제 에서 작성한 클래스메서드getDistance()를 MyPoint클래스의 인스턴스메서드로 정의하시오.

class MyPoint{
	int x;
	int y;

	MyPoint(int x, int y) {
	this.x = x;
	this.y = y;
	}
	/*
	 * (1) getDistance . 인스턴스메서드 를 작성하시오
	 */
}
class Exercise6_07 {
	public static void main(String args[]) {
		MyPoint p = new MyPoint(1, 1);
		// p (2,2) . 와 의 거리를 구한다
		System.out.println(p.getDistance(2, 2));
	}
}
class MyPoint{
	int x;
	int y;

	MyPoint(int x, int y) {
	this.x = x;
	this.y = y;
	}
	double getDistance(int x1, int y1) {
		return Math.sqrt((x-x1)*(x-x1)+(y-y1)*(y-y1));
	}
}
class Exercise6_07 {
	public static void main(String args[]) {
		MyPoint p = new MyPoint(1, 1);
		// p (2,2) . 와 의 거리를 구한다
		System.out.println(p.getDistance(2, 2));
	}
}
1.4142135623730951


6-8 다음의 코드에 정의된 변수들을 종류별로 구분해서 적으시오.

public class PlayingCard {
	int kind;
	int num;
	static int width;
	static int height;

	PlayingCard(int k, int n) {
		kind = k;
		num = n;
	}

	public static void main(String args[]) {
		PlayingCard card = new PlayingCard(1, 1);
	}
}

- 클래스변수(static변수) : width, height

- 인스턴스변수 : kind, num

- 지역변수 : k, n, card, args

변수의 종류 선언위치 생성시기
클래스변수

클래스 영역 클래스가 메모리에 올라갈 때
인스턴스변수 인스턴스가 생성되었을 때
지역변수 클래스 영역 이외의 영역
(메서드, 생성자, 초기화 블럭 내부)
변수 선언문이수행되었을 때


6-9 다음은 컴퓨터 게임의 병사 를 클래스로 정의한 것이다 이 클래스의 멤버중에 static을 붙여야 하는 것은 어떤 것들이고 그 이유는 무엇인가?

(단, 모든 병사의 공격력과 방어력은 같아야 한다.)

class Marine {
	int x = 0, y = 0; // Marine (x,y) 의 위치좌표
	int hp = 60; // 현재 체력
	int weapon = 6; // 공격력
	int armor = 0; // 방어력

	void weaponUp() {
		weapon++;
	}
	void armorUp() {
		armor++;
	}
	void move(int x, int y) {
		this.x = x;
		this.y = y;
	}
}
class Marine {
	int x = 0, y = 0; // Marine (x,y) 의 위치좌표
	int hp = 60; // 현재 체력
	static int weapon = 6; // 공격력
	static int armor = 0; // 방어력

	static void weaponUp() {
		weapon++;
	}
	static void armorUp() {
		armor++;
	}
	void move(int x, int y) {
		this.x = x;
		this.y = y;
	}
}

공통적인 값을 가지는 변수들을 static변수로 선언해야한다.

공격력과 방어력이 같기 위해서는 기본 공격 방어력과 증감연산자가 들어간 메서드에 static을 넣으면 된다.


[6-10] 다음 중 생성자에 대한 설명으로 옳지 않은 것은 모두 고르시오 ? ( b,e )

a. 모든 생성자의 이름은 클래스의 이름과 동일해야한다.

b. 생성자는 객체를 생성하기 위한 것이다.

c. 클래스에는 생성자가 반드시 하나 이상 있어야 한다.

d. 생성자가 없는 클래스는 컴파일러가 기본 생성자를 추가한다.

e. 생성자는 오버로딩 할 수 없다.


b 객체를 생성하는것은 new 연산자이고 생성자는 초기화할 목적으로 사용된다.

e 생성자는 오버로딩이 가능하다.


추가적으로 생성자는 리턴값이 없다. 

생성자도 메서드이기 때문에 리턴값이 없다는 의미인 void를 적어야 하지만, 모든 생성자가 리턴값이 없으므로 생략이 가능하다.

+ Recent posts